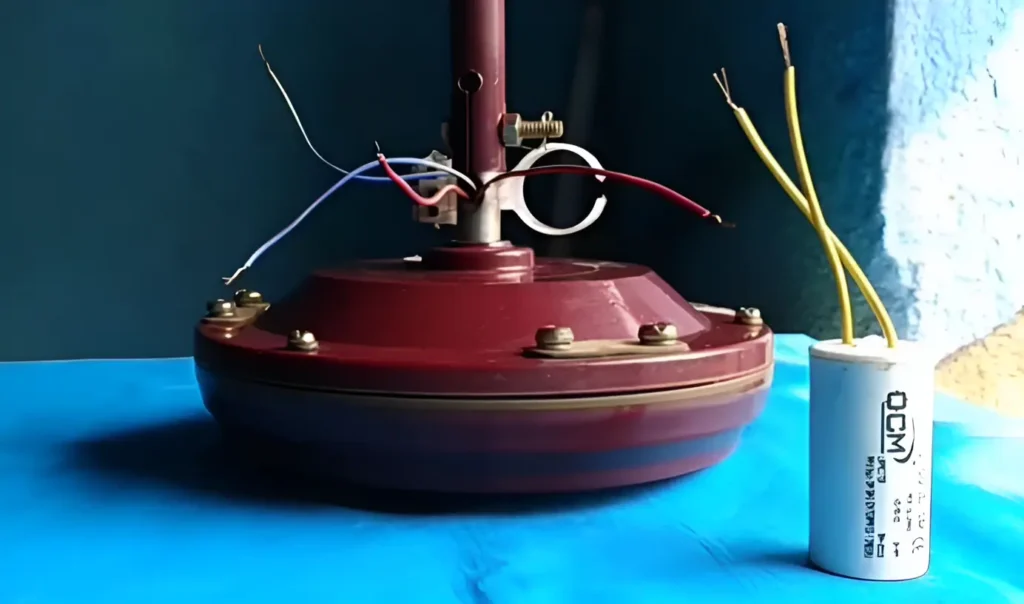
Wondering how to increase ceiling fan speed? You ain’t alone! With the approaching hot summer, the only thing that can bring you relief is sitting under a high-speed ceiling fan.
However, ceiling fans often lose speed for various reasons, like dust and debris, poor capacitors, voltage issues, etc. If you can relate to this, we have got you covered.
This guide will closely discuss the key reasons behind your ceiling fan’s slower speed and practical methods to solve the issues. So, read the guide until the end to move your fan faster and enjoy summer peacefully.
7 Reasons and Methods to Increase Ceiling Fan Speed
Here are 7 reasons and solutions to fix a slow ceiling fan:
- Poor or old capacitor

The capacitor plays a key role in controlling your fan’s speed by regulating electrical energy. In most cases, it’s the main reason behind fan issues. Usually, a capacitor lasts 5 to 12 years, depending on its quality, usage, and surroundings. So, if you’ve never replaced it, there’s a good chance it’s the culprit behind your slow fan.
Solution: Turn off the power, open the motor cover, and locate the capacitor. Since capacitors have different capacities, make sure to replace the capacitor with one that has the same value (e.g., 2.5µF or 4µF) as printed on the old one before replacing it. Disconnect the old one, and attach the new capacitor. Once done, reassemble everything, turn on the power, and test your fan. You will feel the difference instantly.
- Damaged or imbalance blades
Fan blades often get imbalanced or wobbly due to dust accumulation. This dust accumulates unevenly on the fan blades and adds extra weight, causing an imbalance. This imbalance makes the blades wobble instead of rotating smoothly. As a result, the motor has to work harder, leading to a drop in speed over time.
Solution: Clean the fan blades with a mild soap solution or vinegar-water mix, then wipe them with a microfiber cloth. If it still wobbles, use a blade balancing kit or tape a small coin to the lighter blade until the wobble stops.
Safety tip: Turn off the fan and disconnect the power before cleaning. Use a stable ladder or step stool to reach the blades safely. Avoid excessive moisture near the motor, and ensure the fan is completely dry before turning it back on.
- Loose screws
Check if your fan is appropriately installed. Poor installation, loose screws, wobbling of blades, or even voltage fluctuations can significantly impact your fan speed.
Solution: Ensure the fan is securely installed with all screws tightened. Check for loose or wobbly blades and tighten them if needed. Besides, verify stable voltage supply, as fluctuations often affect speed.
- Lack of lubrication
The mechanical components inside the motor, like bearings and motor, need proper lubrication to function smoothly. Over time, the lubrication dries out, increasing friction and resistance. This not only slows down the fan but also raises the risk of malfunction. If ignored, the fan may stop working.
Solution: Locate the hole near the motor, pour 2-3 drops of non-detergent motor oil in it, and gently rotate the blades by hand to spread the oil evenly. However, if you find your fan struggling even after oiling, the bearing may be worn out. You can try replacing them, too.
- Use Ceiling Fan Extenders
If your ceiling fan is mounted too close to the ceiling, it might struggle to circulate air efficiently. In such cases, installing a downrod extender can make a noticeable difference.
Solution: A downrod helps lower the fan to an optimal height (8-10 feet from the floor), allowing it to distribute air more effectively. If your fan seems to be running at full speed but doesn’t provide enough airflow, adjusting its height with a downrod might work as a perfect solution.
- Avoid Overuse
Running your ceiling fan non-stop can overheat the motor, causing internal components to wear out and slow down over time. To prevent this, give your fan short breaks whenever possible to allow it to cool down.
Solution: If you heavily rely on your fan, consider installing an additional fan in your room and using them alternately. This small trick helps reduce strain on a single fan, ensuring both last longer while maintaining optimal speed and performance.
- Replace the speed controller
A faulty speed regulator can restrict power to your fan, causing it to run slower even at the highest setting. If you notice speed fluctuations or unresponsive adjustments, it’s time for a replacement.
Solution: Start by turning off the power from the MCB (if available) to ensure safety. Next, unscrew the existing regulator from the switchboard, disconnect the wires, and install a new, high-quality regulator. Once secured, restore power and test the fan speed.
Safety Tip: If you’re not confident handling electrical work, it’s best to call a professional.
Signs your fan needs professional help
While some fan issues are easy to fix, certain problems require expert attention. If your fan flickers, emits a burning smell, or makes unusual noises while running, it could signal serious electrical or motor issues. Plus, if your fan doesn’t turn on at all, despite checking the power supply and regulator, it’s best to call a professional to diagnose and fix the problem safely.
Conclusion: How to increase ceiling fan speed
A slow ceiling fan can be frustrating, but now you know the key reasons behind it, you can troubleshoot the issues better. However, coming back to the title, here are 3 key ways to increase ceiling fan speed:
- Clean and lubricate the components
- Replace the faulty components like capacitors and bearings
- Ensure proper installation and length between fan and floor
If your fan speed doesn’t improve even after trying these fixes, it’s best to seek professional help. Give these tricks a try, and don’t forget to bookmark this article for future reference.

